🎵 “Twinkle, twinkle, little star, how I wonder what you are…”
Do you remember singing this song as a child and feeling curious about the world around you? Whether it was gazing at the night sky or imagining magical places hidden beyond the trees, wonder has always been a special part of everyone’s childhood.
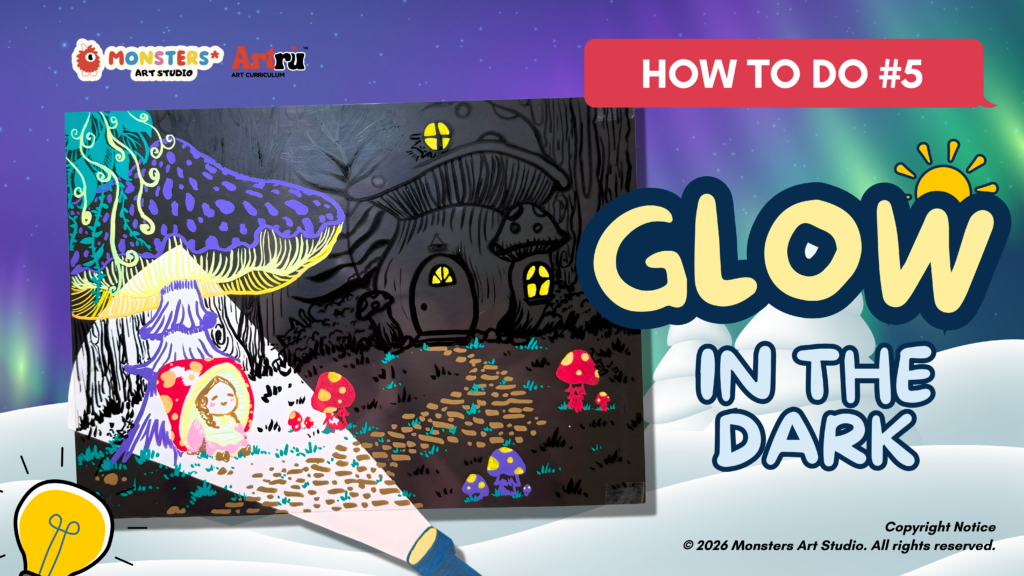
Today, we are bringing that same sense of wonder into our Glow in the Dark activity. As children create an enchanted forest filled with glowing mushrooms, sparkling fireflies and magical creatures, where you will discover how a touch of light can transform an ordinary scene into something magical.
Along the way, children will explore Value, one of the 7 Elements of Art. In simple terms, value refers to how light or dark something appears. Artists use value to create contrast, show depth and draw attention to important parts of their artwork. In this activity, children will see how glowing elements stand out against darker surroundings, helping them understand the power of light and shadow in a fun and memorable way.
For parents, a simple way to explain value is, “how light or dark something looks.” You can encourage your child to observe which parts of the forest glow the brightest and which parts fade into the shadows, helping them connect artistic concepts with hands-on exploration and creativity. ✨🌿🍄🌙 So, what are we waiting for? Let’s get started!
LEARNING OUTCOMES:
By the end of the lesson, we will:
- Understand that value refers to how light or dark something appears.
- Identify areas of light and shadow in an artwork.
- Recognise how contrast helps objects stand out.
- Explore how value can create depth and mood.
- Apply the concept of value in a creative artwork.
MATERIALS NEEDED:
Coloured Markers, Black paper, White paper, Transparent sheet, Double sided tape, Scissors
Safety Tip: Use scissors under adult supervision and always cut away from the body. Handle transparent sheets gently to avoid sharp edges and keep markers capped when not in use to avoid contact with skin or clothing.

STEP 1
Begin by drawing a magical forest scene on the transparent sheet using coloured markers. Fill up space with imaginative elements such as glowing mushrooms, tall trees, sparkling fireflies, magical flowers, woodland creatures or even hidden fairy houses.
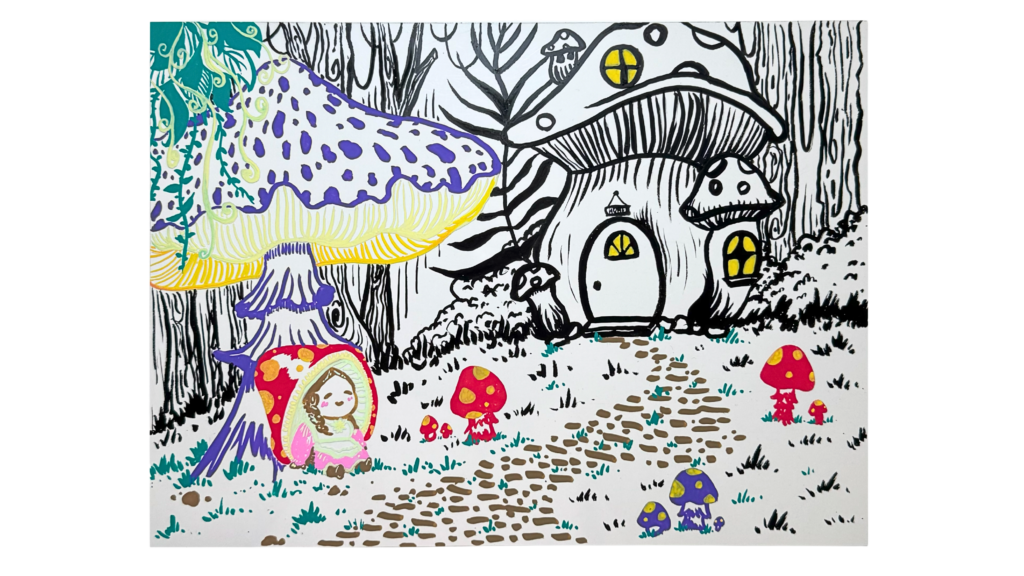
STEP 2
Stick double-sided tape on the edges of the transparent sheet. Then, place the sheet on top of the black paper and press gently to secure it in place. Make sure the drawing is facing up and can be seen clearly.
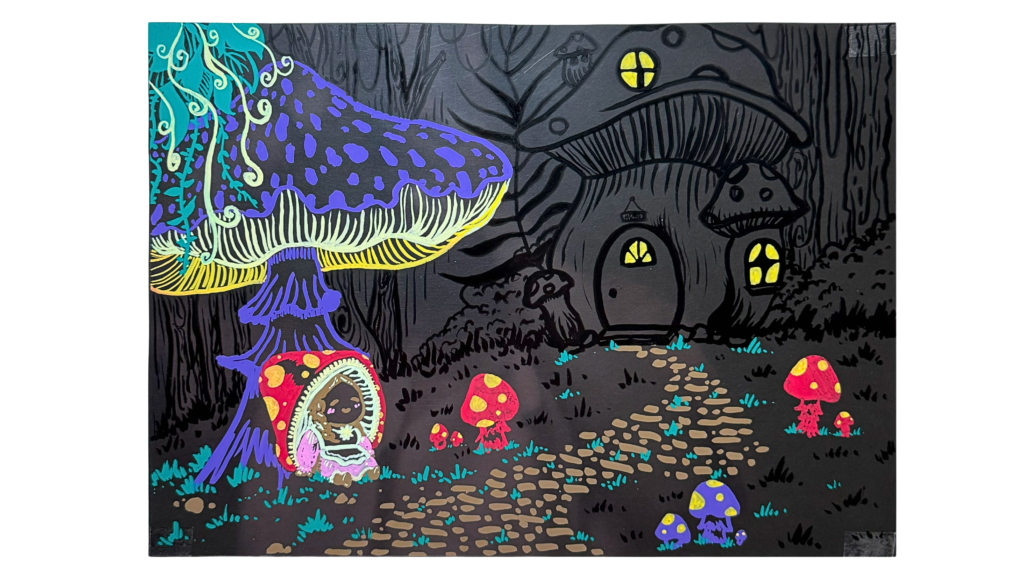
STEP 3
Draw a torchlight with a light beam on a piece of white paper. Then, carefully cut out the torchlight shape using scissors.
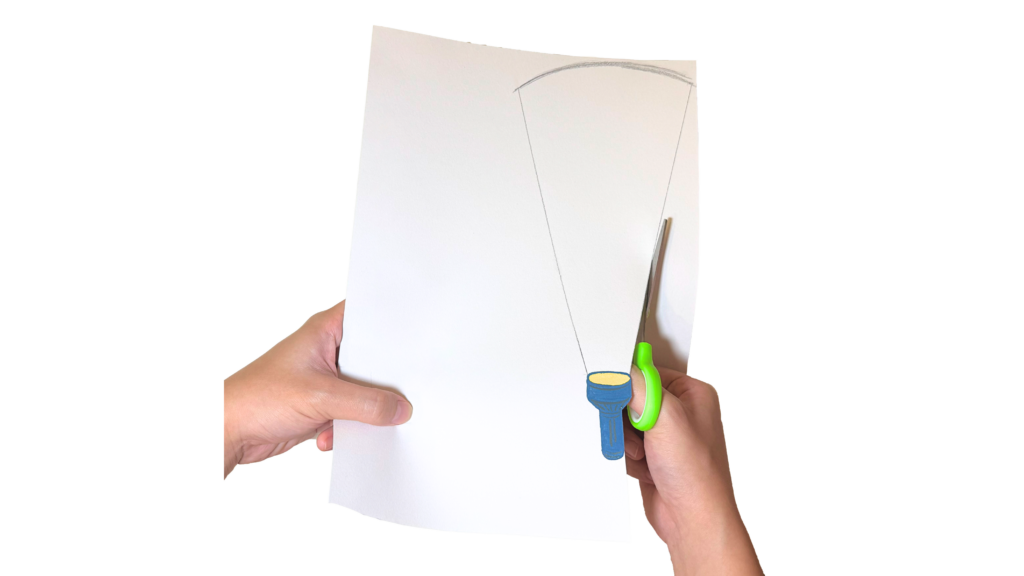
STEP 4
Carefully insert the paper torchlight between the transparent sheet and the black paper. Move it around behind the drawing to see how different areas appear lighter or darker as the “light” shines through.
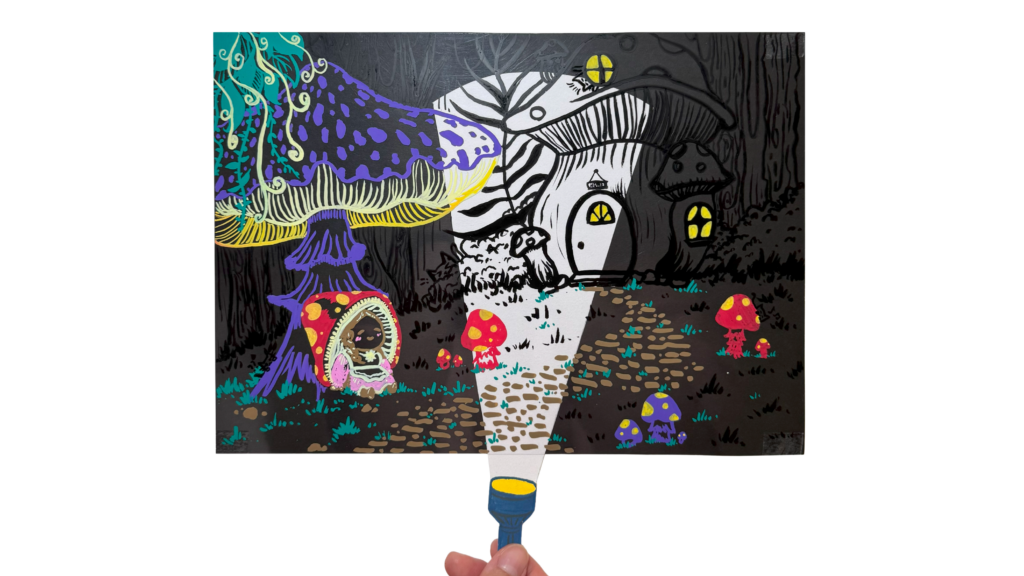
RISE AND SHINE! YOUR ARTWORK IS HERE! ✨🌙
Now slowly move your torchlight behind the scene and watch the forest change as glowing areas appear and shadows shift like magic. Try moving the light closer, farther, and in different directions to see how the mood of your artwork transforms each time.
You may refer to some examples below as inspiration and even try creating a different theme or concept beyond a magical forest to better explore today’s topic on value (light and dark).
For example, you can create an underwater world with glowing jellyfish, a starry outer space scene with planets and comets, a city at night with glowing windows or a deep ocean treasure cave hidden in the dark.
Each artwork may look different, but they all use the same concept of light, shadow and contrast to make certain parts stand out. ✨🌌🌊🏙️